Tutorial: How install the script on a Yahoo hosting account. #
This tutorial describes how to install the script under a Yahoo hosting account. (Yahoo is a registered trademark of Yahoo Inc.)
Yahoo hosting is more difficult than CPanel based hosting providers when it comes to setting up a database. There are more steps to take. Please follow them carefully.
Step 1 #
Log into your Yahoo hosting account. You will see the following screen:

Click on the ‘Web Hosting Control Panel’ to continue…
Step 2 #
Set up the MySQL Database. The following steps show you how to install PhpMyAdmin, how to create the database and finally how to set the privileges for the user.
First, click on the ‘Create & Update’ tab.
![]()
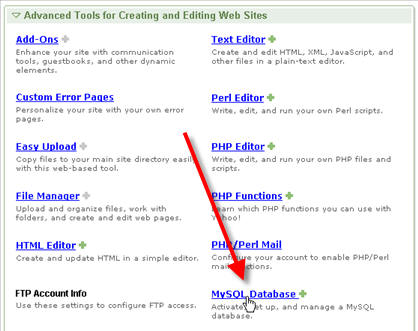
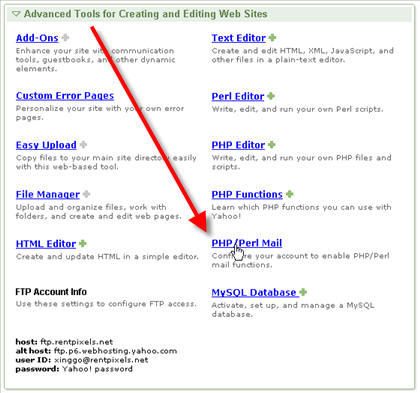
Scroll down to the bottom of the page where you see ‘Advanced Tools for creating and Editing Web sites.
Click on the MySQL Database link.
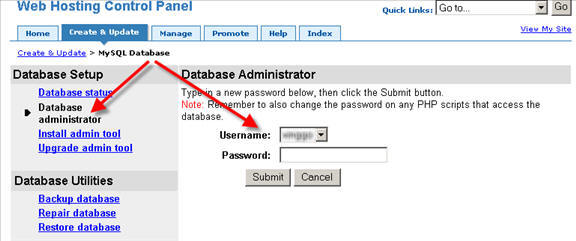
Create a password for the Database Administrator. Please note down the username and password that you create here – you will need it for the future steps.
(Note: This is different from your Yahoo account username and password. This is the username and password that will be used by the PHP Script)
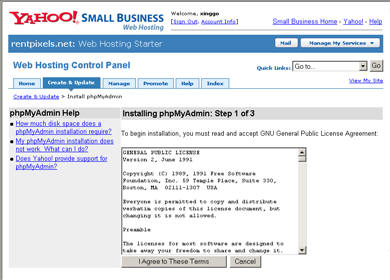
After editing the three settings, click on the Install admin tool link on the left. Complete the 3 Steps to install the admin tool (PhpMyAdmin).
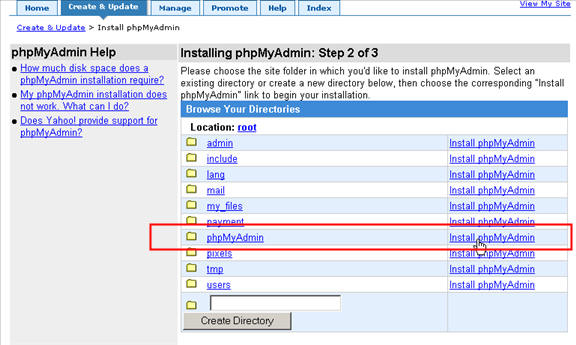
In the second step, you can create a new directory called ‘phpMyAdmin’, then click on the install phpMyAdmin link on the right.
PhpMyAdmin is installed. Log in to phpMyAdmin. Use your Database Administrator password created above (This is not your Yahoo account)
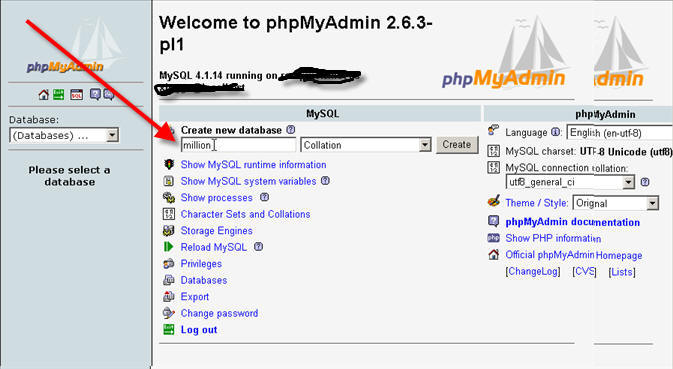
Create a new database named ‘million’. Hit the Create button when done.
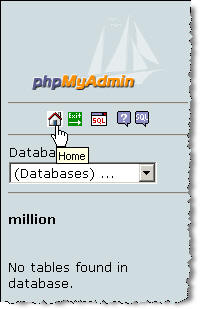
Click on the Home button found in the top-left corner
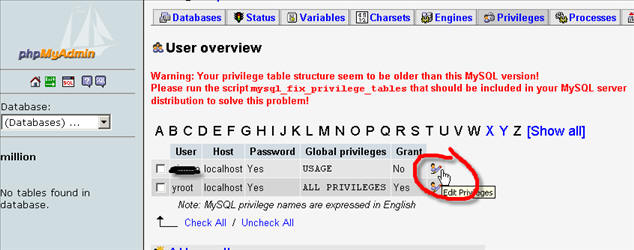
Now we will set up the privileges. Click on the Privileges link in the Home page:

You may see a Warning in red, just ignore it. Click on the little icon as shown in the screenshot below:
You will see a drop-down list in the middle of the page labeled ‘Add privileges on the following database:’. Select ‘million‘ from the list.
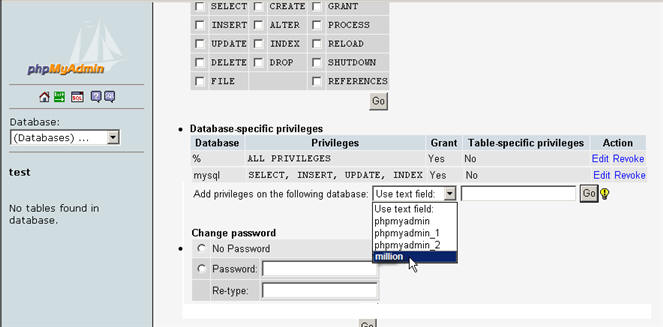
Edit privileges. Click the ‘Check All’ link and click ‘Go’
Phew! If you got through this step OK, give yourself a pat on the back! The next step will show you how to upload the files.
Step 3 #
FTP the files to the server. Connect to the server using the details given in your Yahoo hosting welcome email.
The following screenshots show a freely available FTP client for Windows: FileZilla. Other FTP clients for both Mac and Windows are very similar, and you can get the basic idea from these screenshots.
#1 – Click on the Site Manager icon.
#2 – Fill in your FTP host. If your site is widgets.com then your host will be ftp.windgets.com
#3 – Select ‘Normal’
#4 – Enter your Yahoo user ID
#5 – Enter your Yahoo Password
#6 – Connect

When you log in to your website via FTP, you will be in the main directory (also known as the ‘document root’ or just ‘root’ for short), and there may be some files or directories already there such as the phpmyadmin directory. You may install the script in the main directory, or you may choose to install the script in a sub-directory. If you choose to install in a sub-directory, then create a new directory and change to that directory and proceed as normal. Here we will install the script in the main directory.
To upload the files, simply select the unzipped files on your computer on the left, right click, and then select ‘upload‘. (Select all the files and directories, except Do not select the directory with the double periods ..)
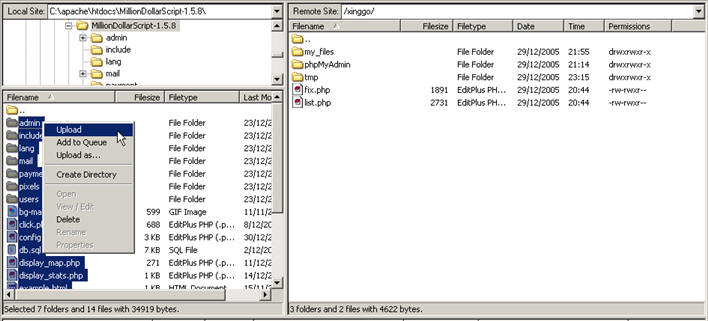
(Note: The screenshots here show FileZilla, but the files can be uploaded using any other ftp client. Your computer is on the left site, Yahoo is on the right side.)
IMPORTANT NOTE FOR YAHOO HOSTING
If you haven’t done so already, yahoo hosting requires you to create the following directories in the main directory. Use your FTP client to create the following directories:
1) create tmp subdirectory
2) create sessions subdirectory
3) create logs subdirectory (this is where the errors will be logged, very useful for trouble shooting your script)
Step 4 #
Use the FTP client to set the file permissions.
admin/temp/ – chmod 777 (read, write & execute for all)
pixels/ – chmod 777 (read, write & execute for all)
config.php – chmod 666 (read & write for all)
And also (if you have the latest version):
upload_files/images/ – chmod 777 (read, write & execute for all)upload_files/docs/ – chmod 777 (read, write & execute for all)
optional: lang/english.php – chmod 666 (read & write for all)
Because Yahoo Hosting is Unix based, we need to set the permissions using chmod. many FTP clients support this functionality.
For detailed information, please see a detailed permissions tutorial here.
Step 5 #
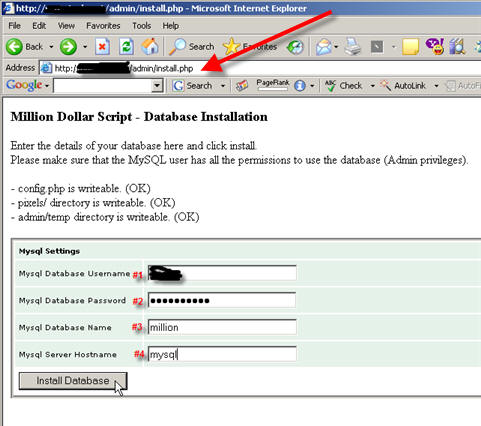
Go to the script’s installation page, http://www.yourdomain.com/admin/install.php
Fill in the database details that you entered in step 2
Make sure to fill it in carefully.
#1 – This is the database administrator username from step 2
#2 – This is the database administrator username form step 2
#3 – The database name from step 2
#4 – Enter ‘mysql’, as stated in Yahoo hosting documentation
Click ‘Install Database’ when done.
This will install the database. Once successful, delete admin/install.php from your server.
Step 6 #
Finish off the rest of the configuration. Log into the admin http://www.yourdomain.com/admin/
The default password is: ok
Go to the main configuration and enter the remaining setup values:

1. Set the Site’s HTTP URL address (use the recommended settings)
2. Set the sites Server path to admin (use the recommended settings)
3. Mail configuration: DO NOT USE THE SMTP SERVER SETTINGS
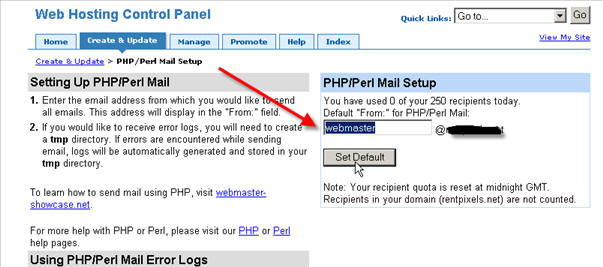
Note: Yahoo Hosting allows you to send email to a maximum of 250 recipients per day. This may be a problem if you have more than 250 customers per day. You will also need to setup the ‘From:’ mail for PHP. Here’s how it’s done:
Go to the ‘Create & Update’ menu, scroll down to ‘Advanced Tools’ and click PHP/Perl Mail.
Setup your email address where indicated by the arrow:
4. Set any other settings that you wish, such as Admin’s email address, website name and more.
Configure the email account that you used in step 3
Step 7 #
That’s it! The script is now installed. There are other things you can now do, such as edit the language, set the prices, setup the payment modules. etc.
And don’t forget to process the images from the ‘process pixels’ menu!